Surface mechanical pretreatment of aluminum
The purposes of mechanical pretreatment
- To provide favorable expressional conditions and raise the quality of surface finish;
- To level up the products;
- To reduce the impact of welding;
- To create the ornamental effect;
- To acquire a clean surface.
The common used approaches of mechanical pretreatment
The common used approaches of mechanical pretreatment include polishing、sandblasting、brushing、rolling, etc. What kind of specific approach to be used is according to the types、production methods、initial status on surface、final finishing level s of the products.
The principles and functions of chemical polishing
High—speed glaze—wheel rubs with the workpiece to produce high temperature, which means that plastic deformation occurs on the metal surface where will be smoothed its convex—concave points. In the meantime, the paper—thin oxide film produced immediately on the metal surface around the atmosphere by oxidation is to become increasingly polished through repeated ablation. Its main functions is to remove the surface defects such as burrs、scratches、corrosion spots、sand holes、porosities. At the same time, trying a further attempt at cleaning the slight uneven workpiece surface to make it have higher glossiness , until getting the mirror effect.
The principles and functions of sand—blasting
Using purgative compressed air to spray to the surface of aluminum products with dry sand flow and other abrasive particles aims to remove the surface defects to have an even unglazed sand surface. Its main functions are that it removes burrs、slag of casting the other defects as well as dirt on the workpiece surface; it can improve the mechanical properties of alloys and obtain the even matting effect on the surface.
The principles and functions of brushing
Brushing is to use the revolving brush of brush wheel to wipe off the flaws such as burrs and dirt on the product surface. To aluminum alloy, it is in wiredrawing processing, whose fundamental purpose is for ornament.
The principles and functions of rolling finish
Rolling finish tells that puts workpiece into a roller which contains abrasive material and chemical solution, and to have the aid of its pinning to make workpiece and abrasive material as well as workpiece and workpiece rub with each other to gain the polishing effects.
Aluminum and Its Characteristics
The Techniques of the Surface Treatment of Aluminum Alloy
- Low density
The density of aluminum is about 2.7g/cm3, which is the second lightest mental in metal construction , merely going above magnesium. Its density is only one third of iron or copper.
High plasticity
Aluminum and its alloys are quite ductile which can be made as all kinds of models、boards、foil、tubes and wires through pressure working methods such as extrusion、rolling and drawing techniques.
Easy to be intensified
Pure aluminum has low intensity. However, it is intensified easily by alloying and heat treatment to become intensive aluminum alloy. Meanwhile, its intensity can be parallel to alloy steel. The electrical conductivity and thermal conductivity of aluminum follows silver、gold and copper. Supposing that relative conductivity of copper is 100, aluminum’s is 64 while that of copper is 16. If it is calculated among the same quality metal of their conductivity, aluminum’s is nearly twice as much as copper’s.
Corrosion resistance
Aluminum can have a chemical reaction with oxygen easily. Under the natural circumstances ,the aluminum surface will produce protective oxide, which has much better corrosion resistance than steel.
Easy to recycle
The melting temperature of aluminum is low, which is about 660°С. Its waste is easy to reborn so the recovery is extremely high, along with energy consumption is only 3% of smelting.
Weldable
Aluminum alloy will be excellent in mechanical property、corrosion resistance through TIG welding method. Also, it will have the appearance of beauty and meets the structural requirements.
Easy to have surface treatment
Aluminum will possess high hardness、corrosion resistance and fine electrical insulation by means of anodizing shading method. It can be also further its decorative and protective functions through electroplating、cataphoresis and flame plating after chemical pretreatment.
Webster Hardness Testing for Aluminum and Aluminum Alloy
The Webster hardness testing for aluminum alloy material is applied the most in aluminum alloy section factories and aluminum alloy doors, windows and walls in the constructional industry. It is stipulated in the national standard GB/T 5237 that use the Webster Hardness Tester to test the hardness of aluminum alloy constructional profiles. In the construction industry standard JJG 139-2001 Glass Curtain Wall Installation Quality Inspection Methods, it is stipulated that use Webster Hardness Tester on site to test the hardness of aluminum profiles which used in the curtain wall project. The acceptance hardness value is more than 8HW(which is equivalent to 52HBS). Besides, the Webster Hardness Tester could also be applied in testing aluminum alloy plates and pipes.
The suitable range for testing of alloy is from 1××× to 7×××. The suitable hardness testing range is equivalent to Rockwell hardness value from 42 to 98HRE, and Brinell hardness value from 42 to 120HBS. The Webster Hardness Tester has small size, light weight, and is easy to operate. It causes no damage to specimen, especially suitable for testing hardness of aluminum alloy.

- Test Principle, Computational Formula
The basic principle of the Webster Hardness Tester is that press a certain shape chilled indenter into the surface of specimen under the action of a standard spring test force. It is defined that every 0.01mm indentation depth is one Webster hardness unit. The hardness of material and the indentation depth are in inverse proportion. The smaller the indentation depth is, the higher the hardness value is, while the bigger the indentation depth is, the smaller the hardness value is.
Computational Formula:
HW=20-L/0.01
In the formula:
HW— The Webster hardness symbol
L— Extension length of the indenter, that is the indentation depth pressed into the specimen /mm
0.01—— Defined value/mm
Indication of hardness value: If the indentation depth of indenter is 0.05mm, the dial head will point at 15 scale. It is indicated that HW=20-5=15 unit hardness value. Write it before hardness symbol, that is 15HW.
- Testing Instrument
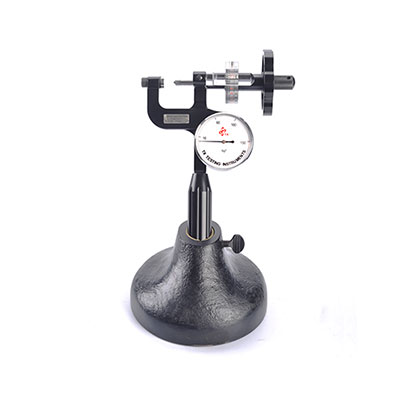
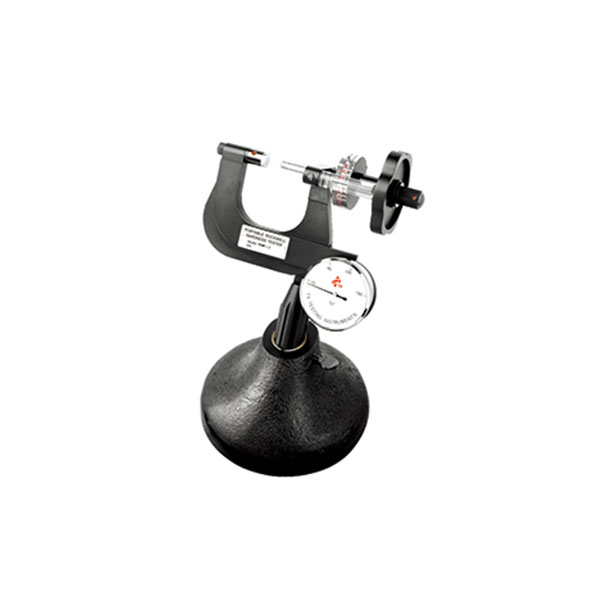
So far, the Webster Hardness Tester for aluminum alloy has three models: W-20, W-20a and W-20b. The testers used the most in Chinese industries are W-20 series Webster Hardness Testers which are manufactured by Shenyang Tianxing Company. Shenyang Tianxing has been manufacturing Webster Hardness Tester for 20 years. The product quality and test accuracy have all been up to the international advanced level. So far, the national standard for Webster hardness test which Shenyang Tianxing participated in drafting is going to be carried out.W-20 is a general type suitable for testing aluminum alloy material whose thickness is from 0.8 to 6.0mm, especially suitable for testing aluminum alloy profiles.
W-20a can be used for testing aluminum alloy material whose thickness is from 6.0 to 13mm.
W-20b is designed specialized for thin tubes. It can be applied in testing hardness of aluminum alloy tubes with diameter more than 5.0mm.
- Specimen
The testing surface of specimen should be smooth and clean, without any mechanical damage or burr on the edge. Any coating on the testing surface should be cleared away thoroughly, and any slight scratching should be polished lightly.
The smallest size of specimen is about 25mm×25mm. When testing, the distance from indentation to edge should be assured no less than 3mm.
The Difference And Conversion Of Rockwell Hardness, Brinell Hardness And Other Hardness (2)
HR-Rockwell hardness
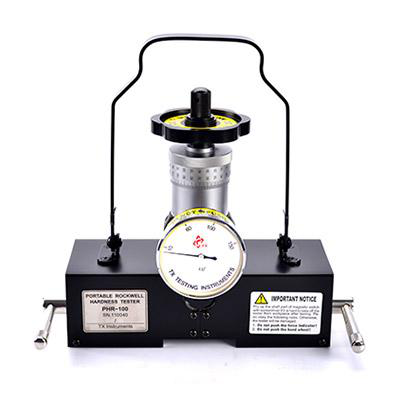
Rockwell hardness (HR) depend on the indentation plastic deformation depth to determine the hardness value of the index with 0.002 mm as a unit of hardness. When HB> 450 or the sample is too small, Portable Rockwell hardness tester is suitable to use rather than Brinell hardness tester. It press a vertex angle of 120 ° diamond cone or diameter of 1.588, 3.175mm carbide ball into the surface of the measured material with a certain test force. And according to the depth of the indentation to calculate the hardness of the material. According to the hardness of the test material, there are three different scales:
HRA: It is suitable for high hardness materials (such as cemented carbide, etc.). The hardness is obtained according to the 60kgf test force and diamond indenter,
HRB: It is suitable for low hardness materials (such as annealing steel, cast iron, etc.). The hardness is obtained by 100kgf test force and diameter 1.588mm carbide ball.
HRC: It is suitable for high hardness materials (such as hardened steel, etc.). According to the 150kgf test force and diamond indenter to calculate hardness.

In addition:
(1) HRC is the Rockwell hardness C scale.
(2) HRC and HB is widely used in the production industry.
(3) HRC is suitable for HRC 20-88, equivalent to HB225-650
Rockwell hardness A scale is useful if the hardness is higher than this range. If the hardness is below this range, you can use the Rockwell Hardness B scale HRB. The hardness value of Brinell hardness tester can not be higher than HB650.
(4) The indenter of Rockwell hardness tester C gauge is diamond indenter with the vertex angle of 120 degrees, the test force is a certain value, and the Chinese standard is 150 kg force.
The indenter of Brinell hardness tester is the hardened steel ball (HBS) or carbide ball (HBW), the test force varies with the diameter of ball from 3000 to 31.25 kg force.
(5) Rockwell hardness indentation is small. As the measured value has locality, more points need to be measured to find the average. It is attributed to a class of non-destructive testing for finished products and flakes.
Brinell hardness indentation is large with standard measured value. Generally, it do not belong to the class of non-destructive testing and not suitable for finished products and flakes.
(6) The hardness value of Rockwell hardness tester is an unknown number without unit. (So it is customary to say that the degree of hardness is not correct.)
The hardness value of Brinell hardness tester has an unit, and it has a certain approximate relationship with the tensile strength.
(7) Rockwell hardness display directly on the dial or it can also be digital display. It is suitable for mass production with the advantages of simple operation, fast and intuitive.
Brinell hardness tester need to use a microscope to measure the indentation diameter, and then look up the table or calculation. Its operation is more cumbersome.
(8) Under certain conditions, HB and HRC can look-up table and swap. The conversion formula can be roughly recorded as: 1HRC ≈ 1 / 10HB.
Precautions of Rockwell Hardness Tester
In addition to the various precautions used when using a variety of hardness, there are some common issues that should be noted as follows:
1, Rockwell hardness tester itself will produce two kinds of errors: First, the error caused by deformation and moving of its parts; Second, the error is caused because the hardness parameters excess the standard. For the second error, you can use a standard block to calibrate the durometer before measuring. The difference of Rockwell hardness calibration results within ± 1 is qualified. You can give a correction value if the difference between ± 2 within the stable value. When the difference is outside the range of ± 2, the hardness tester must be calibrated or tested for other hardness test.

As the scale of Rockwell hardness has a applicable scope, you should select correctly according to according to the provisions. For example, when the hardness is higher than HRB100, HRC scale should be used for testing; hardness below HRC20 can use HRB scale for testing. If it beyond its specified test range, the sensitivity of hardness tester is poor and hardness value is not accurate, it should not be used. Other hardness test methods are also provided with the corresponding calibration standards. The standard block for Calibration of the hardness tester can not be used on both sides, because the standard surface and the back surface hardness is not necessarily the same. It is generally prescribed that the standard block is valid for one year from the date of calibration.
2, In the replacement of the indenter or anvil, you should pay attention to contact parts to keep cleaning. After changing, use a sample with certain hardness to test several times until the hardness value it the same for two times. The purpose is to make the indenter or anvil contact with test machine tightly. Therefore, the accuracy of the test results is guaranteed.
3, The first test point is not used after adjusting the hardness. Because the measured value may not be accurate due to the poor contact with the anvil. When the first test finished, the hardness tester is in normal operating mechanism, then the formal test of the sample can be started and remember to record the measured hardness value.
4, In the case of allowing the specimen, we generally select different parts of the test for at least three hardness values and take the average value as the hardness of the specimen.
5, The sample with complex shape should use the corresponding shape of pad to fix before the test. The test piece is generally placed on a V-shaped anvil.
6, Check whether the loading handle is on the unloading bit before loading and keep load action light stable without fast force. After loading, the load handle should be placed on the unloading position, so that the instrument is not in a state of long-term load and occurs plastic deformation, affecting the measurement accuracy.
Portable Hardness Tester Precautions
Portable hardness tester is increasingly widely used because of its small size, light weight, easy to carry, a wide range of detection, easy to operate, high detection speed and so on. What’s more, portable hardness tester can be converted into a variety of hardness values and can be used in any location.
First, the factors that affect the accuracy of the test
① Pretreatment of specimen. In order to eliminate the test error caused by surface roughness, the test surface of the specimen must be exposed to metallic luster with smooth surface. The surface roughness Ra value should reach 2um (equivalent to the original national standard ▽ 6), otherwise the test value is not accurate.
② The measured surface should be clean without oil, otherwise the test value is not accurate.
③ Surface workpiece testing. The the test specimen whose curvature radius R is less than 30mm should use small support ring in the test, or the test value is not accurate.
④ The test support of small test pieces. The specimen which is heavier than 5kg do not need to support. The specimen less than 5kg generally should not be applied because the impact will lead to movement of the specimen and test result is also not accurate. The following measures are required if you want to use it: support the specimen with an object heavier than 5 kg; the coupling surface of the specimen and the support object must be smooth and tight; less coupling agent can be used between the coupling planes; the test direction must be perpendicular to the coupling plane.
⑤ The thickness of the specimen should be less than 5mm. When the specimen is a large area plate, it should be reinforced or supported on the back of the test point. Otherwise, even if the thickness is large, the test value may not be precise due to the deformation of the specimen.
⑥ The test piece itself should not be magnetized, otherwise the test value is not precise.
Second, the test operation requirements
① Test point selection: two test points spacing should be> 3mm.
② Placement: The impactor support ring is pressed against the measured surface.
③ The workpiece, the impact device and the operator body should be in a stable state while pressing the impact device release button.
Third, the working environment temperature:
-10 ° C to + 55 ° C.
Fourth, calibration:
It is a good idea to verify the instrument by using a standard block before testing.

Five, numerical processing:
Test results should take the average of 3 to 5 times or more tests. A large error data that deviates from the normal range can be deleted.
Six, test:
It should be test at least once a year, and it can be used continually as long as it is qualified.
TX is the abbreviation of Tianxing. TX Testing Instruments is a professional manufacturer of portable hardness testers, founded in 1993, with 5.6 million registered capital and a self-built factory occupied 4,600.